Are you wondering how to connect your Blue Yeti microphone to your Xbox One?
It’s simple!
Here’s what you’ll need (assuming you have an Xbox One and a Controller):
- Headset Audio Controller for Xbox One
- 3.5mm Y-Splitter Audio Adapter Cable
- A 3.5 mm Audio Cable
- A USB cable (included with Blue Yeti)
- Recommended: Headphones
Overview
To connect a Blue Yeti to an Xbox One, plug the Blue Yeti into your Xbox via USB. Then, use the 3.5mm Y-Splitter Audio Adapter Cable to connect the Blue Yeti to your Xbox controller – via the Headset Audio Controller.
How to Connect Blue Yeti to Xbox One in 5 Steps
Step 1: Plug the Blue Yeti into a USB Port on your Xbox
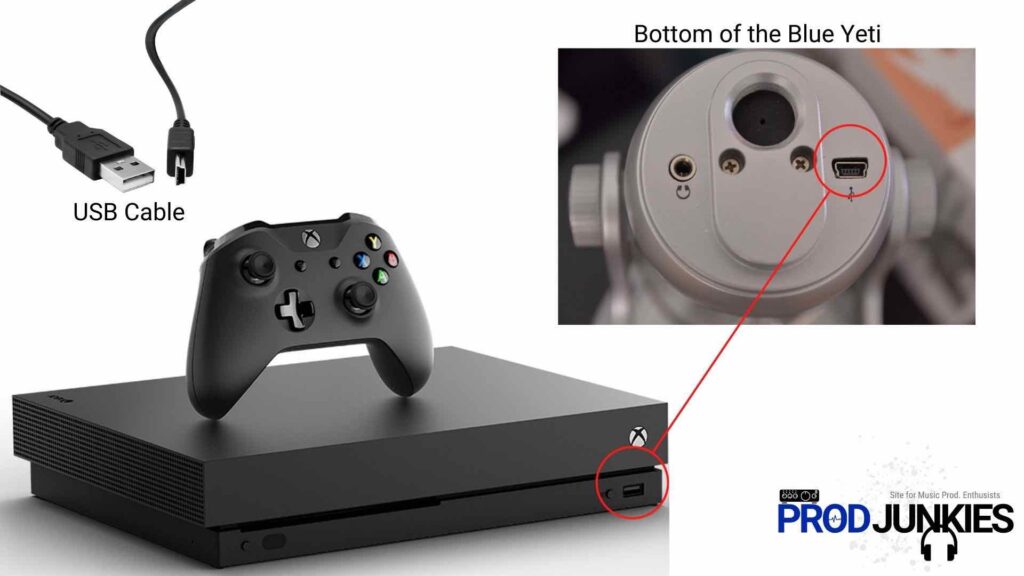
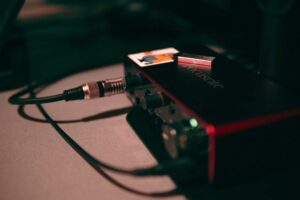
Connect the USB connector on the bottom of the Blue Yeti to a USB port on your Xbox.
Your Blue Yeti should light up.
Step 2: Attach the Headset Audio Controller to your Xbox One Controller
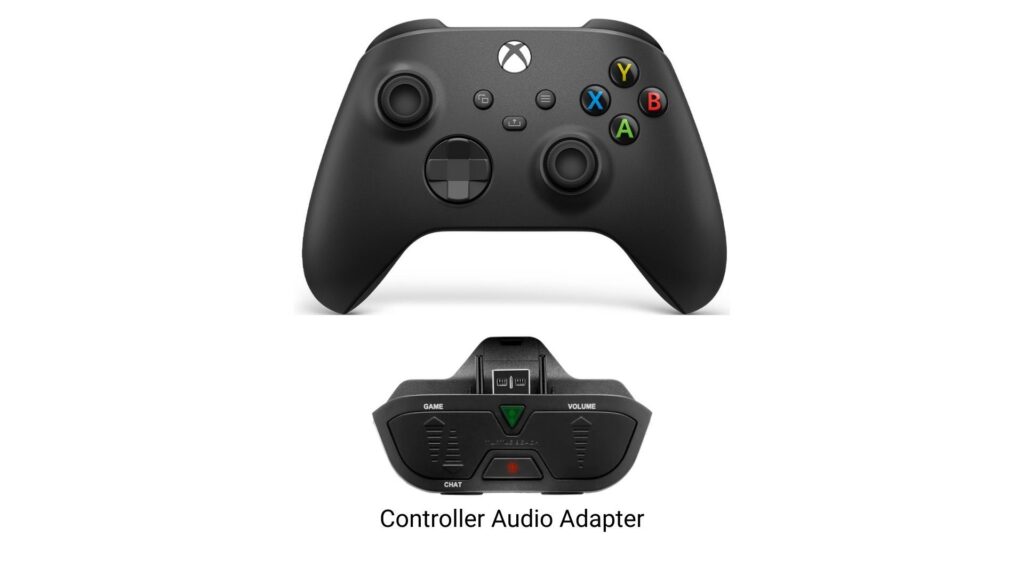
Insert the Headset Audio Controller into the expansion port on your Xbox One controller.
If you’re unfamiliar with a Headset Audio Controller, it’s a device that allows you to control the audio output of your gaming headset.
You can use it to adjust the game audio level, chat audio level, and mute the mic on your gaming headset.
Additionally, it has a 3.5mm jack for connecting a pair of headphones so you can hear both the game audio and chat audio through your headset.
Connecting this device to your controller gives you much more control over your audio during gameplay.
Step 3: Connect Y-Splitter Cable to the Headset Audio Controller
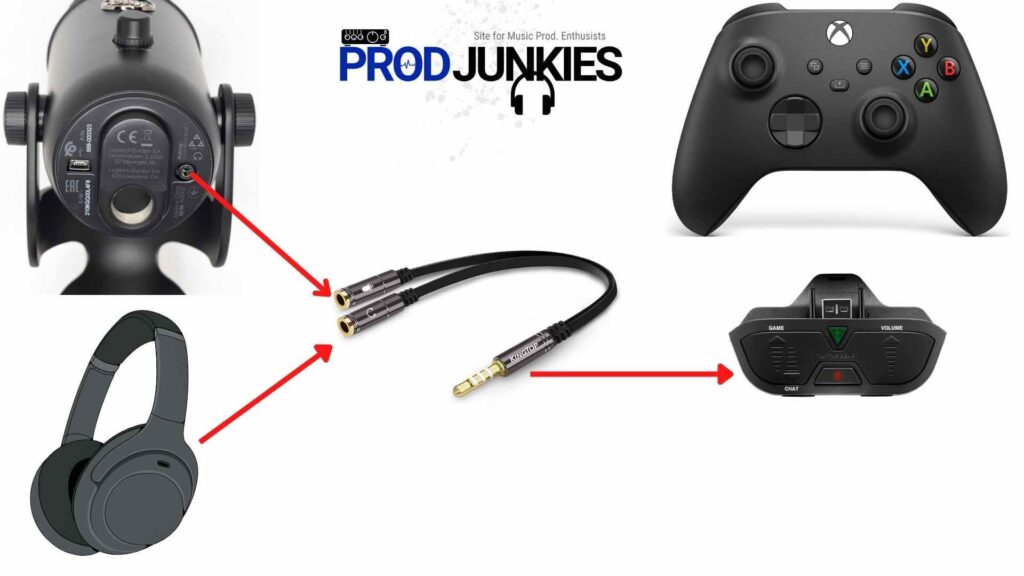
The Y-Splitter cable allows you to connect the Blue Yeti and a pair of headphones to your headset audio controller.
Step 4: Plug your Blue Yeti into the Headset Audio Controller
Connect one end of a 3.5 mm audio cable to the bottom of the Blue Yeti.
Attach the other end to the microphone jack on the Y-Splitter cable.
Step 5: Attach Headphones
Plug your headphones into the Y-Splitter cable’s headphone jack.
Once completed, you’ll be able to use the Blue Yeti with your Xbox One – and hear audio from the game and chat in your headphones.
What Makes the Blue Yeti Good for Gaming on Xbox?
- Four pattern modes (cardioid, omnidirectional, bidirectional, stereo)
- Gain control, mute button, zero-latency headphone output
- Plug-and-play – USB bus powered, no drivers needed
- Compatible with Mac and PC
- Durable
The Blue Yeti is one of the most popular USB microphones. But is it worth the hype?
Let’s take a look at the features to help you decide.
Adjustable Polar Pattern
The Blue Yeti has four polar pattern modes: cardioid, omnidirectional, bidirectional, and stereo.
If you’re unfamiliar with polar patterns, cardioid is the most popular and picks up sound from the front of the microphone while rejecting noise from the sides and back.
Omnidirectional picks up sound from all around the microphone, making it great for recording a group of people.
Bidirectional picks up sound from both the front and back of the microphone, making it ideal for recording an interview.
Stereo mode uses two microphones to record a stereo signal.
Gamers and streamers tend to use cardioid mode since it picks up direct sound from the front and reduces background noise.
However, the Blue Yeti lets you change its polar pattern to fit different recording scenarios.
Controls
The Blue Yeti also has an onboard gain control knob, mute button, and zero-latency headphone output.
The gain control allows you to adjust the microphone’s sensitivity.
The mute button is self-explanatory.
And the zero-latency headphone output lets you hear yourself in real-time without delay.
Convenience
One of the best things about the Blue Yeti is its plug-and-play.
It has a built-in analog-to-digital converter, so you can connect it to your Xbox without needing an audio interface.