Understanding key audio production concepts is crucial for capturing clean audio.
One of these concepts is noise floor.
Noise floor refers to the level of background noise present in a recording or audio system.
In this post, we’ll discuss how noise impacts your recording quality.
We’ll also explain its causes and ways to minimize it.
Let’s start by defining exactly what noise floor is.
What is Noise Floor?
Noise floor is the sum of all unwanted noise in an audio signal.
It’s the white noise in the background of your recordings that you just can’t seem to get rid of.
Your audio gear is the main culprit.
However, it can also come from your environment or electrical interference from nearby devices.
If you have a microphone, set it up in your room and listen to what you hear.
You’ll likely hear humming, hissing, or buzzing sounds.
That’s noise floor.
Now try turning up your preamp gain.
You’ll notice the noise getting louder.
Why is that?
When you amplify an audio signal, you also amplify its background noise.
Signal-to-Noise Ratio
There are many steps you can take to minimize noise floor.
But the most important one is maximizing your signal-to-noise ratio (SNR).
Simply put, your SNR is the difference between your audio signals volume and the level of unwanted background noise in your recording.
Luckily, maximizing your SNR starts at the source.
You can control your SNR by recording a louder signal relative to the background noise.
To do so, make sure your mic is close enough to the sound source – your voice or instrument.
You can even project your voice more to ensure that you’re recording a loud enough signal.
Otherwise, your signal noise will be relatively close to your audio, resulting in a noisy recording.
How to Minimize Your Noise Floor
there are several steps you can take to minimize noise floor.
Here are the most common methods:
- Make sure you’re recording a loud enough signal
- Use a quality microphone
- Record in an acoustically treated room to minimize ambient noise
- Use noise reduction software
- Use an audio interface with a low-noise mic preamp and set your gain properly
- Use high-quality cables
- Avoid ground loops
- Isolate your recording devices from other electronics that can cause interference.
In the next section, I’ll explain what factors cause noise in your recordings.
I’ll also provide steps you can take to capture cleaner, less noisy audio.
Cause #1: Microphone Self-Noise
Self-noise in a condenser microphone refers to the inherent noise it generates.
This noise usually comes in the form of a hum or hiss caused by the mic’s internal electronic components.
Minimizing Noise Floor from Microphone Self-Noise
You can reduce microphone self-noise by upgrading your mic, acoustically treating your room, or using noise reduction software.
Upgrade Your Microphone
A microphone’s self-noise level can vary between models.
Its usually listed by manufacturers as Equivalent Noise Level measured in A-weighted decibels (dBA).
And of course, low self-noise microphones are typically more expensive as they help you capture cleaner audio.
So if you want to maximize your recording quality, a mic with a low ENL can help.
However, there are more effective steps you can take before upgrading your mic – adding acoustic treatment to your space and using noise reduction software.
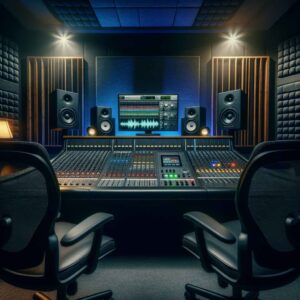
Acoustic Treatment
Acoustic treatment is like giving sound reflections a place to call home.
Without it, sound reflections have no place to go.
They’ll bounce freely around your room, enter your mic, and affect the clarity and quality of your audio recordings.
You can use acoustic treatment to absorb and redirect these reflections, to create a more controlled recording environment.
There are many acoustic treatment options to choose from – panels, bass traps, and diffusers.
Each plays a role in taming sound reflections and reducing unwanted noise in your recordings.
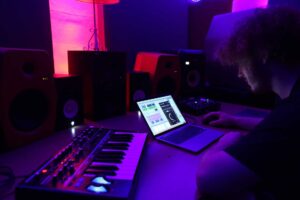
Noise Reduction Software
Once you record and noisy audio signal, it’s not too late.
You can use noise reduction software to get that unwanted noise out of there.
Noise reduction software can analyze a sample of the noise in your recording and apply filters to remove it.
This method is an effective way to remove static hisses from your audio in post-production.
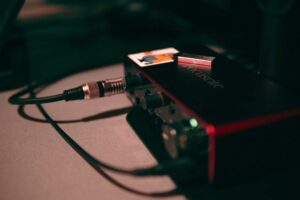
Cause #2: Analog-to-Digital Converter
Your analog-to-digital can also cause noise due to quantization errors.
To understand how it helps to know what role an ADC plays in the recording process.
An ADC receives audio signals from your mic and makes digital copies for your computer.
It does this by sampling each audio signal’s amplitude at regular intervals.
Then, it “quantizes” each sample by assigning a specific number (1 or 0) to represent its amplitude.
The difference between the actual amplitude of the signal and its quantized representation results in quantization errors, which causes noise.
Similar to how rounding a number with a decimal to the nearest whole number introduces a small error, an ADC adds quantization noise when it rounds the amplitude of a continuous signal to a finite number of values.
How to Minimize Quantization Noise
Dithering
Quantization noise occurs when an ADC rounds audio signal samples to fit within the limited digital format.
This rounding can add unwanted noise to your signal. But you can reduce it by dithering your audio.
Dithering works by adding a low-level, random noise to your audio, effectively masking the rounding errors, and reducing the quantization noise.
Check out this article to learn when and how you should dither your audio for cleaner recordings.
Cause #3 Electrical Interference
Ground loops and electromagnetic waves from devices such as cell phones and Wi-Fi routers can cause electrical interference.
Ground loops and interference from these devices can cause humming or buzzing sounds in your recordings.
Ground Loops
Ground loops occur when you have two devices linked together are connected to separate power outlets. This scenario creates a current loop that can add a hum or buzz to your audio signal.
Electronic Interference
Did you know your phone can worsen your audio quality?
Mobile phones and even WIFI routers release radio frequency waves.
These waves can interfere with your audio equipment causing unwanted noise in your recordings.
How to Minimize Electronic Interference
The easiest way to prevent ground loops is to connect your equipment to the same power source.
You can also try using a Ground Loop Isolator or Hum Eliminator.
To limit electrical interference from phones, turn on airplane mode or keep your phone away from your recording devices.
Setting up your WIFI router outside of your recording room also helps.
You’ll also want to use high-quality cables.
They’re better at shielding your signal from electrical interference from other devices.
They’re also made with better-quality material that prevents noise interference over long runs.
If possible, try using high-quality balanced cables across your setup. These can be TRS or XLR.
Cause # 4: Mic Preamp Noise
A mic preamp is the gatekeeper of your audio recordings.
It controls the strength of your microphone’s signal and can even add its own unique flavor to your sound.
But as powerful as it is, it can also add unwanted noise.
When a mic preamp boosts an audio signal, it can make undesirable noise more noticeable.
It even adds a little noise itself.
However, by choosing a high-quality mic preamp and using proper techniques, you can ensure your mic preamp is working for you, not against you.
How to Minimize Mic Preamp Noise
Set Your Gain Properly
You’ll want to record a loud signal to maximize your signal-to-noise ratio but not too loud to where your audio is clipping.
Contrary to popular belief, lowering your gain won’t reduce your noise floor relative to your audio signal.
It’ll reduce the signal from your mic and the noise floor proportionally.
Therefore, lowering your gain will cause you to record a lower-level signal from your mic but won’t reduce your noise floor relative to your audio signal.
Instead of lowering your gain, try recording a louder signal into your mic.
To do so, sing/speak louder or reduce the distance between the sound source (your mouth or instrument) and your microphone.
Ideally, you’ll want your audio signal peaking around -18 and -12 dBFS at a normal speaking voice.
This range will ensure that your audio is loud relative to the noise floor but not clipping.
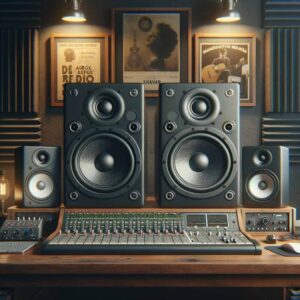
Use High-Quality Equipment
Your audio equipment also plays a major role in the noise floor of your recordings.
Higher-quality mic preamps and audio interfaces tend to produce less noise than lower-quality units.
Takeaway: What Noise Floor is and How to Keep it Low
Understanding what factors contribute to noise and knowing how to address them is essential for recording professional-quality audio.
Home studio recording is convenient, but many potential issues can affect your audio quality – improper acoustic treatment, environmental noise, electrical interference, low-quality cables, equipment, etc.
If noise is ruining your recordings, now you know where it might be coming from.
Even better, now you know how to address these issues.
It starts at the source.
Make sure you’re recording a loud enough signal to maximize your signal-to-noise ratio.
Avoid electrical interference by keeping your electronics away from your recording devices.
Add acoustic treatment to your space. Use noise reduction software.
Upgrade your equipment over time.
Don’t let noise hold you back from producing amazing audio.
Embrace these tips and watch your recordings soar to new heights!