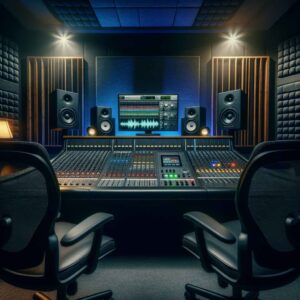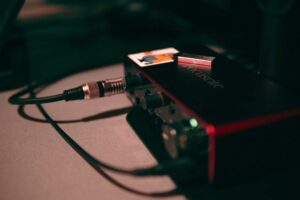
An audio interface connects musical instruments, microphones, and other sound sources to a computer or mobile device for recording and production purposes.
It acts as a bridge between analog audio sources and the digital world by converting audio signals into a digital format that a computer can process.
With the increasing popularity of home recording studios, the demand for audio interfaces has grown.
They come in a variety of sizes and capabilities, ranging from simple, portable models to complex, rack-mounted units.
Whether you are a musician, producer, or sound engineer, an audio interface is an essential piece of equipment for capturing high-quality audio.
In this post, we’ll dive deeper into the world of audio interfaces.
I’ll go in-depth on how they work and their benefits.
I’ll also provide an overview of common interface features, connection types, and more.
What is an Audio Interface?
You can think of an audio interface like a language translator.
Like a translator helps people who speak different languages communicate, an audio interface allows analog audio devices to talk to your computer.
How Sound Works: The Backstory to Understanding Audio Interfaces
Analog sound sources – like our voices and instruments – produce sound waves that travel through the air.
Plucking a string on a guitar, for instance, creates vibrations that travel in the form of sound waves.
Our ears turn these vibrations into electrical signals that our brains understand as sound.
Sound Waves to Audio Signals: The Key to Understanding Why Interfaces are Important
Condenser microphones are like our ears.
During vocal recording, sound waves hit a condenser mics diaphragm causing it to move back and forth.
This movement changes the distance between the mics diaphragm and its backplate.
In technical terms, this change in movement causes a change in the capacitance between the two plates, creating an electrical current.
This electrical current mimics the sound wave that originally entered the microphone.
In short, this electrical current is what we called an audio signal.
An audio signal is simply an electrical representation of a sound wave.
Analog Audio Signals to Digital Audio Signals: The Foundation of Digital Recording
Consider a wave in an ocean.
It’s a continuous movement of water that varies in height.
A wave in the ocean is the perfect analogy for an analog audio signal. But, instead of height, an audio signal is an electrical current that changes in amplitude over time.
Amplitude is what we use to measure the strength of an electrical signal at a given point.
You can also think about amplitude as how loud or quiet an analog audio signal is.
While our brains can interpret electrical signals (analog audio signals), computers can’t.
Since computers can’t process analog audio signals, audio interfaces are what make digital recording possible.
How Computers Work
An audio interface is a bridge between analog audio and the world of digital recording and editing.
When you do anything on a computer – run a program or give it a command – it’s Central Processing Unit (CPU) performs a series of calculations.
This aspect of how computers work is important because they can only perform operations on digital data.
What is digital data exactly?
Digital data is made up of a series of binary digits or 1s and 0s.
How does this relate to audio interfaces?
An audio interface converts analog audio signals into 1s and 0s.
Analog-to-Digital Converter (ADC)
Analog audio signals are continuous meaning they can have a range of amplitude levels.
Conversely, digital data is made up of a series of discrete values meaning there can only be two possibilities (1 and 0).
An audio interface uses an analog-to-digital converter (ADC) to create a digital representation of an audio signal.
This converter is what allows you to record audio into your computer where you can edit and manipulate it.
ADC and Sampling: How an Interface Converts Audio to Digital
Here’s how an ADC creates a digital replica of an audio signal:
An ADC takes “snapshots”, or samples, of an incoming audio signal at certain intervals.
The sampling rate you set in your DAW determines the number of snapshots it takes per second.
In theory, higher sampling rates allow for more snapshots per second. And by taking more snapshots, an ADC can create a more detailed representation of an audio signal.
These days, most audio interfaces are compatible with sampling rates up to 96 kHz (96,000 samples per second) or 192 kHz (192,000 samples per second).
On the other hand, your audio interface’s bit depth determines how many times its ADC measures an audio signal’s amplitude in each sample.
Higher bit depths, such as 16-bits and 24-bits allow your device to capture more amplitude levels per sample.
By capturing more amplitude levels, your ADC can produce a more accurate representation of the original audio signal.
As you can see, sample rate and bit depth are closely related. They both influence the quality and resolution of your recordings.
Digital-to-Analog: How We Hear Digital Audio Signals
Along with an ADC, an audio interface also has a digital-to-analog converter (DAC).
This component receives digital data from your computer and reconstructs the original analog audio signal that it represents.
It does what the ADC does in reverse – converts binary digits into electrical signals.
Your interface sends the reconstructed audio signal to its built-in headphone amplifier for playback through headphones.
It also sends the audio signal to its main outputs where it can be amplified and projected by studio monitors.
What Does an Audio Interface Do?
To summarize, an audio interface connects analog audio devices to your computer.
Analog audio device creates or receive audio signals which are an electrical representation of sound waves.
For example, a microphone receives sound waves and converts them into audio signals.
Then, it sends these audio signals to an ADC that samples them to create a digital data representation (or digital audio signals).
On the other end, a computer sends digital signals to an interface’s DAC.
The DAC turns this digital data back into audio signals.
When studio monitors receive audio signals from an audio interface’s DAC, they amplify them and project them as sound waves.
As you can see the digital audio process is a cycle.
An audio interface is what makes this cycle possible.
Why You Need an Audio Interface for High-Quality Audio Recording and Playback
Why do you need an audio interface?
Why not just use a USB mic that you can connect directly to your computer?
Why can’t you just connect your studio monitors/headphones to your computer’s 3.5mm output?
There are three main reasons why you need an audio interface to maximize your recording and playback quality.
First, standalone interfaces offer better A/D and D/A converters than the internal converters in USB mics and computers.
They also offer the lowest latency performance and the best microphone preamplifiers of the three options.
We highly recommend using an audio interface if you want to record or produce high-quality music.
Here are more details on the three advantages you get by using an audio interface.
Quality Analog-to-Digital and Digital to Analog Converters
Your audio quality is highly dependent on the AD/DA converters in your recording device.
As we mentioned earlier, an ADC samples an audio signal by measuring its amplitude at regular intervals.
With that said, recording through a USB microphone or a computer’s sound card is like taking a picture with a lower-quality camera.
An ADC can’t capture and reproduce as much detail in an audio signal as a quality audio interface can.
While USB mics are convenient, your recordings will lack clarity and definition.
Your playback audio will also lack clarity if you connect your studio monitors directly to your computer.
Since computers and USB mics have many other functions, they’re not optimized for high-quality audio conversions.
Conversely, the converters in interfaces typically produce audio that more accurately represents the original sound source.
Plus, they minimize latency.
Latency Reduction
Latency is the delay between the time it takes for you to hear an audio signal that you create.
Just as a gamer wants a short delay between pressing a button and seeing the result on screen, a musician or audio engineer wants an unnoticeable delay possible between playing a note or recording a vocal and hearing it.
In both cases, too much latency can negatively impact performance.
Interfaces reduce latency by using high-speed A/D and D/A converters that efficiently convert audio signals from analog to digital and vice versa.
Many audio interfaces also have low-latency drivers that allow for direct communication between your interface and computer.
Lastly, they provide direct monitoring which is a latency-reducing feature we’ll discuss in the last section.
Microphone Preamps
Besides AD/DA converters another important interface component is a microphone preamplifier.
A mic preamp strengthens mic signals so they’re loud enough for recording.
Why is a preamp necessary?
Microphones output weak signals, around -40 to -60 dBV.
Recording mic signals at this level will produce noisy low-quality audio.
A preamp allows you to amplify weak signals to a sufficient recording level. T
However, two main problems can arise when you amplify weak mic signals.
One, your preamp doesn’t have enough gain.
Or two, your preamp adds a lot of noise to your signal.
When you’re evaluating an interface’s mic preamp quality, pay attention to its total available gain and equivalent input noise measurement.
The key to a high-quality mic preamp is its ability to provide a high amount of gain without adding a lot of noise or distortion.
Generally, interface preamps offer more gain and a lower noise floor than USB mic preamps.
These characteristics allow you to capture clearer, more professional-sounding recordings.
Preamp Controls
Interfaces also have gain control knobs, giving you more flexibility when setting gain levels.
With gain knobs, you can set your mic input gain accurately which is crucial for maximizing your audio quality.
Setting your gain too high can add distortion to your audio.
Conversely, setting it too low can add a lot of noise to your signal.
Ideally, you want to find a sweet spot where your mic signal is loud relative to any background noise – also known as maximizing your signal-to-noise ratio (SNR).
However, you don’t want your mic signal too loud to where it’s distorting – or clipping.
Many interfaces have clipping indicators or gain level meters, allowing you to monitor for clipping.
Overall, audio interfaces have built-in mic preamps, more gain, and a lower noise floor than more convenient recording options.
They also have gain controls and clipping indicators giving you more control over your input levels. Plus, they help you avoid recording distorted audio.
All of these tools help you record cleaner takes so your final product sounds more professional.
Inputs and Outputs (I/O)
Audio interfaces usually have four types of inputs: mic, instrument, line, and MIDI.
These inputs make it possible for analog audio and MIDI devices to communicate with computers.
Mic Inputs
Mic inputs come in the shape of an XLR connector, which provides a balanced audio connection.
This connection type reduces noise and interference from nearby electronics better than unbalanced connections.
Instrument Inputs
Interfaces usually have 1/4” high-impedance instrument inputs for guitars, basses, and keyboards.
Line Inputs
Line inputs receive line-level signals.
You can connect audio mixers, mic preamps, compressors, and other line-level sources to these inputs.
MIDI Inputs
MIDI inputs and outputs allow your MIDI devices and computer to communicate so you can control virtual instruments on your computer.
A MIDI input can transfer MIDI signals to a computer via a 5-pin din MIDI cable.
Outputs
Audio inputs enable your computer to receive messages from your audio devices.
On the other hand, outputs convert data from your computer into sound waves so you can hear your digital audio.
Audio interfaces have either 1/4” or RCA outputs.
1/4” inch outputs provide a balanced connection. You can use TRS cables with this connection type.
Conversely, RCA connectors are unbalanced and require RCA cables.
The difference is balanced cables are more resistant to interference and noise than unbalanced cables over long distances.
The most common output devices associated with interfaces are studio monitors and headphones.
Some interfaces even have multiple main outputs and/or dual headphone outputs.
With multiple main outputs, you can connect a high-quality pair of studio monitors and a reference pair to get a better idea of how your audio will sound on different speakers.
Engineers use reference monitors to help them make more informed mixing decisions.
On the hand, dual headphone outputs are great for tracking.
They allow you and another person to hear the same audio during a recording session.
If you need more headphone outputs than your interface provides, a headphone amp is a great option as well.
Computer Connection
Audio interfaces come with various connection types: USB, Thunderbolt, PCI, Firewire, and Ethernet.
Each one has different performance characteristics, such as speed, stability, and compatibility.
USB interfaces are most common due to their ease of use and compatibility with most computers.
Thunderbolt and Firewire interfaces tend to offer faster speeds and lower latency than USB 2.0.
PCI interfaces are typically used in high-end professional audio systems, while Ethernet-based interfaces provide low-latency, high-channel-count options.
Audio Interface Features
Besides A/D and D/A conversion and mic preamps, audio interfaces come with other features that can aid your recording process.
Here’s an overview of the most common ones.
Phantom Power
+48V (48 volts) phantom power provides a condenser mic with the external power source it needs to charge its active electronic components.
Your interface sends this voltage through the same XLR cable that carries audio signals from your mic.
This voltage allows your condenser mics diagram to move in response to vibrations you’re your voice.
This movement allows your condenser mic to convert sound waves into audio signals.
While dynamic microphones don’t need phantom power, condenser mics won’t work without it.
Direct Monitoring
Direct monitoring lets you hear audio entering your inputs without delay.
It allows you to hear yourself with near-zero latency, making it easier to record in sync with an instrumental or previously recorded track.
Preamp Emulations
Some interfaces come with mic preamp emulations.
For instance, Focusrite’s Scarlett interfaces have an Air Mode feature that emulates its ISA 110-mic preamp.
Air mode emphasizes high frequencies in your audio to create brighter-sounding recordings.
Other entry-level interfaces that offer a similar feature are Universal Audio’s Volt 2 – with Vintage Mode and Solid State Logic’s SSL 2 – with its 4K Legacy mode.
Interface Software
Most interfaces come with a software bundle for beginner producers and engineers.
A typical software bundle includes a simplified DAW, such as Ableton Live Lite.
It also tends to include a collection of virtual instruments and mixing plug-ins.
Interface manufacturers include these software bundles to help you get started recording and producing.
Digital Signal Processing
An audio interface with digital signal processing (DSP) offers more processing power and versatility than a conventional audio interface.
DSP lets you monitor and record through onboard plugin effects in real time without latency.
A DSP interface is different from a traditional interface. It has a dedicated processor that can handle complex audio processing tasks.
Conversely, a traditional audio interface relies on the host computer’s processing power to perform these tasks, leading to increased latency and reduced processing power.
ADAT and SPDIF Expansion
ADAT (Alesis Digital Audio Tape) is a connection type that lets you transfer up to 8 channels of audio over a single optical cable.
On the other hand, S/PDIF (Sony/Philips Digital Interface) lets you transfer two channels of audio over a single coaxial or optical cable.
They both provide a convenient and compact way to transfer digital audio between devices while maintaining high audio quality.
You can connect two ADAT or SPDIF audio interfaces to increase your inputs and outputs for larger recording sessions.
Takeaway: What is An Audio Interface?
An audio interface is an important tool for anyone looking to record and produce audio.
It provides a way to convert analog signals into a digital format that your computer can process.
It also offers various benefits compared to recording with a USB and listening through your computer’s sound card.
These benefits include higher-quality audio conversion, cleaner mic preamps, and less latency.
Interfaces also have multiple inputs and outputs for various audio devices and connection types for different setups.
Lastly, you’ll also find units with a host of features – phantom power, direct monitoring, software, DSP, preamp emulations, and ADAT and SPDIF expansion.
With its ability to enhance sound quality, reduce latency, and improve recording efficiency, an audio interface is an important investment.
Whether you’re just starting or upgrading your existing setup, investing in a quality interface is a step towards achieving professional-quality recordings.