So, you just bought an analog compressor (or thinking about it), and now you’re wondering how to connect it to your audio interface.
Setting up analog gear can be tricky if it’s your first time.
You’d be surprised how easy it is to damage your equipment by using the wrong inputs and outputs.
Here’s a simple 3 step guide on correctly setting up a hardware compressor in your home studio.
Overview
Step 1: Run your Mic Through a Mic Preamp using an XLR Cable
Step 2: Link your Preamp to your Compressor using Another XLR (or TRS) Cable
Step 3: Use a TRS cable to connect your Compressor’s Line output to a Line Input on your Audio Interface
Here’s What you Need to Connect a Compressor to an Audio Interface
- Analog Compressor
- Audio Interface with Line Inputs
- A Mic to Record Vocals
- A Mic Preamp for +48V Phantom Power
- XLR and TRS Cables
One of the most common ways to use compression is on vocals.
To do so, you can run your microphone through an analog compressor.
From there, linking your compressor to your audio interface allows you to add compression to vocals while recording.
While this sounds simple, there are a few extra steps you’ll need to take to set everything up properly.
+48V Phantom Power Source
You’ll need a +48V phantom power source if you’re using a condenser mic.
We recommend using a mic preamp. One we use is the ART TubeMPSTV3.
A mic preamp will power your condenser mic and boost your mic signal from mic level to line level.
Then, you can link your preamp to the line input on your compressor.
Running signals from your compressor to your audio interface is simple once you have a mic preamp and the proper cables.
Here’s a simple 3 step guide on how to set everything up.
How to Connect a Compressor to an Audio Interface in 3 Simple Steps
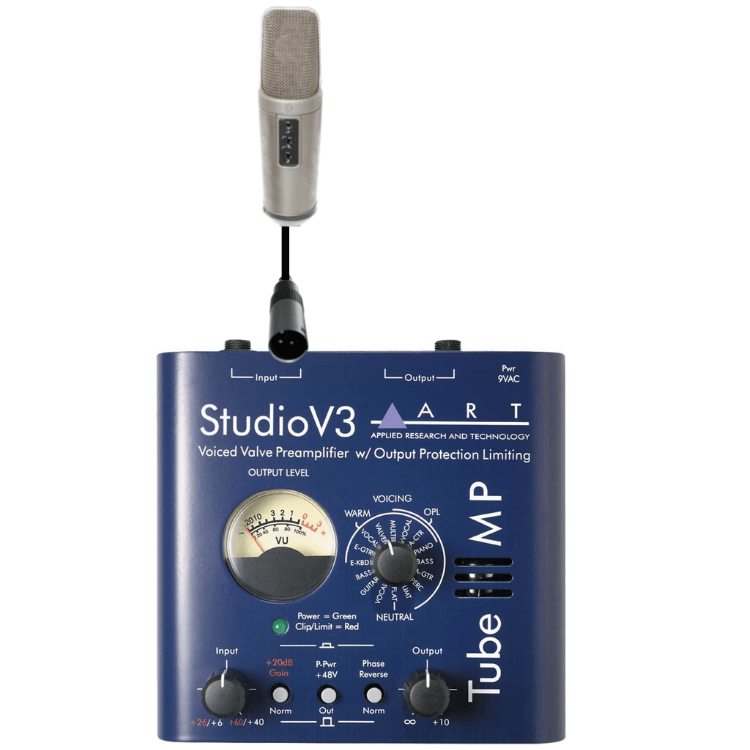
Step 1: Run your Mic Through a Mic Preamp using an XLR Cable
- XLR Cable – Mic to Mic Preamp

Plug one end of your XLR cable into your microphone and the other into the mic input on your mic preamp.
Then, enable +48V phantom power on your preamp and adjust your gain, if necessary.
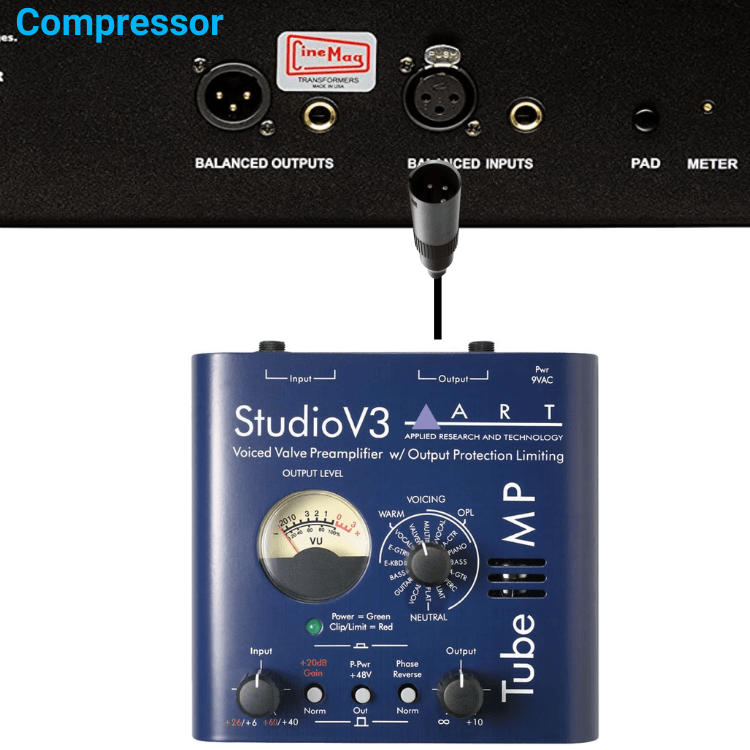
Step 2: Link your Preamp to your Compressor using Another XLR (or TRS) Cable
- XLR Cable: Preamp to Compressor

Insert one end of your XLR cable into the line output on your preamp.
The other end can go into the line input on your compressor.
Many compressors and preamps provide XLR and ¼-inch inputs and outputs. You can use both interchangeably without affecting sound quality.
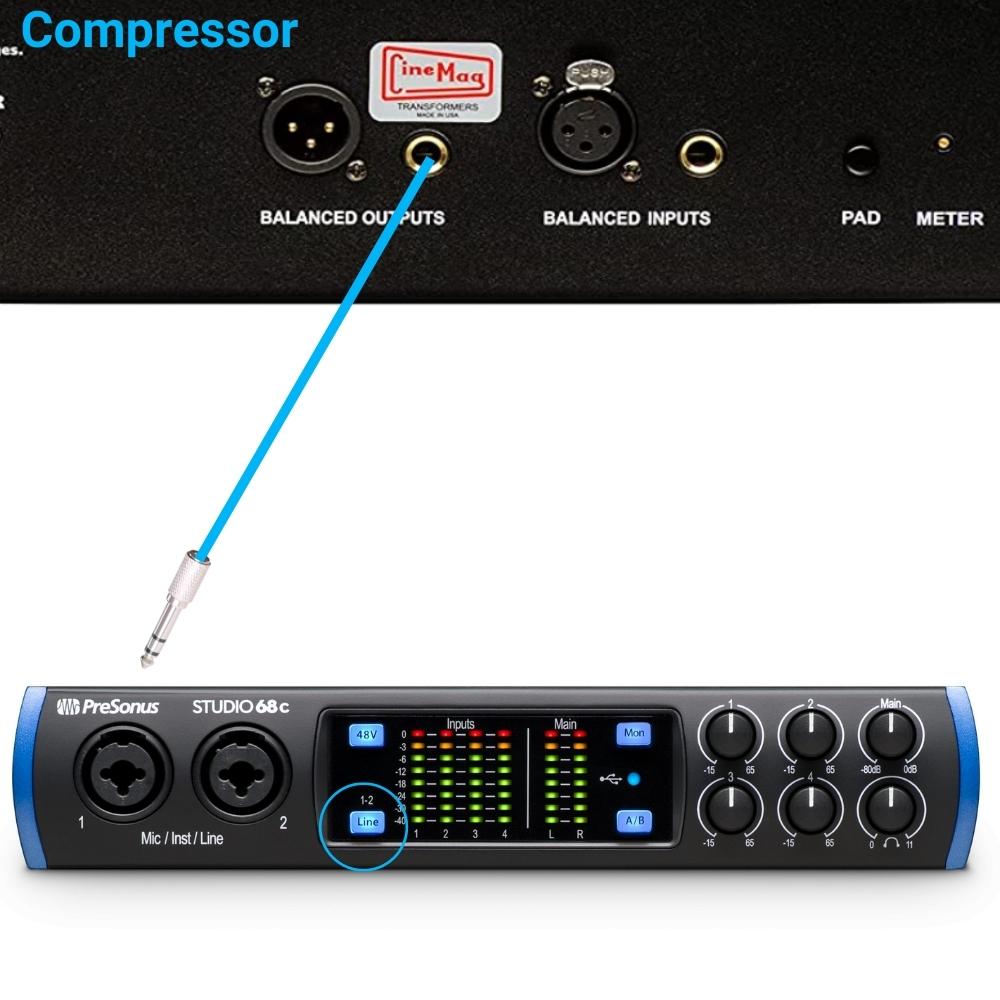
Step 3: Connect your Compressor’s Line output to a Line Input on your Audio Interface

- TRS Cable: Compressor to Audio Interface – Audio Interface to Computer
Lastly, use a TRS cable to run signals from your compressor to your audio interface.
To do so, connect one end to your compressor’s line output and the other to a line input on your audio interface.
Why it’s Important to Use your Audio Interface’s Line Inputs
Since we already used a preamp to boost our mic signal to line level, it’s essential to use your interface’s line-level inputs.
Why?
Mic and instrument inputs in audio interfaces have built-in preamps. Sending line-level signals from your compressor to these inputs can add noise and even damage your equipment.
Many audio interfaces have dedicated line inputs. If not, you’ll likely be able to switch its 1/4-inch inputs between instrument and line-level through a button on the interface.
Summary: How to Connect a Compressor to an Audio Interface
Analog compressors aren’t as common these days, especially since every DAW has a compressor plug-in.
However, many people still love the idea of having analog equipment in their home studios.
Here’s how to set up a compressor if you decide to take the analog route.
Step 1: Connect your mic to your mic preamp
Step 2: Run an XLR cable from your preamp to your compressor
Step 3: Run a TRS cable from your Compressor’s Line output to a Line Input on your Audio Interface


