Once you know how to read audio interface specs, comparing different models is a breeze.
With so many interfaces to choose from, we always look at an interface’s specs before investing in it. This information gives you an idea of how it performs relative to other interfaces.
Looking at specs is important since some interfaces perform better than more expensive ones.
Here’s a complete guide on everything to look for when buying an audio interface.
Overview
The most important audio interface specs are dynamic range, EIN, frequency response, and dynamic range. These measurements demonstrate an interface’s ability to record and playback audio that accurately represents the source.
What is an Audio Interface?
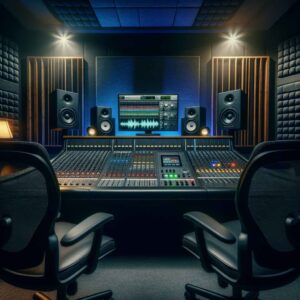
An audio interface links analog audio equipment – mics, guitars, compressors, mixers – to your computer.
An interface is essential in digital music production since audio gear produces an analog wave signal – or audio signals.
You can think of audio signals as electrical signals representing sound waves.
The problem is computers can’t understand audio signals independently. They need an analog-to-digital converter (ADC). This is where an audio interface comes into play.
ADC, DAC, and Preamps
An interface’s ADC samples audio signals and sends digital versions to your computer.
For playback, your computer sends digital signals back to your interface, where a digital-to-analog converter (DAC) reproduces audio signals to play through your listening devices.
With that said, the audio you hear during playback is a product of your DAC.
Audio interfaces also have built-in preamps to boost incoming audio signals to the proper level for recording.
Essentially, we can get a sense of an interface’s quality by looking at specs associated with its ADC, DAC, and preamps.
What Audio Interface Specs Tell Us
Audio interface specs tell us how well an interface performs relative to other interfaces.
Independently specs may not tell you much. But they can help you make informed buying decisions when you use them to compare interfaces.
Keep in mind that some measurements you see on a spec sheet may misrepresent an interface’s performance.
Manufacturers use different tests and measuring systems to determine the number they publish.
You can check out our reviews on various audio interfaces where we provide measurements from our tests and tests conducted by trusted professionals.
Input and Output Specs: A/D and D/A Converters
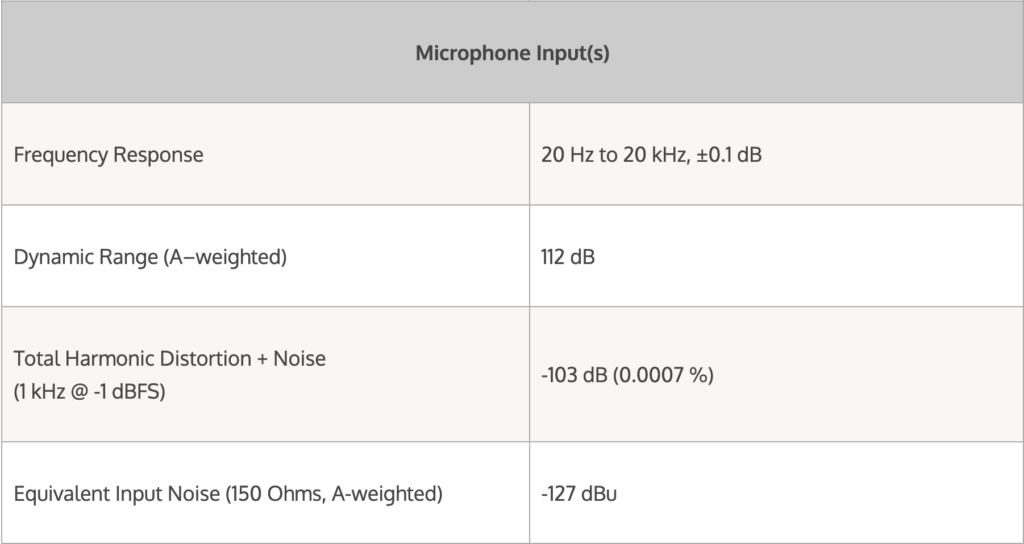
Frequency Response

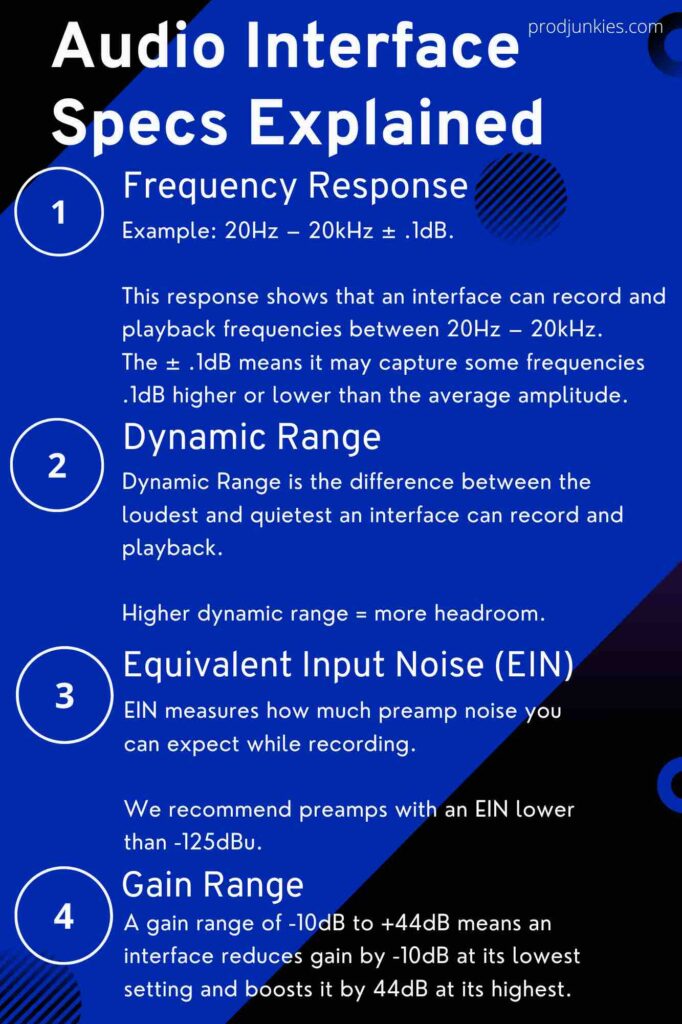
On the spec sheet, you may see frequency response listed as 20Hz – 20kHz ± .1dB.
This response shows that an interface can record and playback frequencies between 20Hz – 20kHz. The ± .1dB means it may capture some frequencies .1dB higher or lower than the average amplitude.
20Hz – 20kHz is the audible human hearing range. An audio interface should at least be able to record, and playback sounds within this range.
The hearing range is made up of different frequency regions – low, mid, and high.
An interface with a relatively flat frequency response can accurately capture and reproduce different frequency regions.
In other words, you won’t have to worry about your interfaces changing tones in your audio. What you record will be what you hear.
Frequency response is an essential audio interface spec. However, it’s easy to overlook since nearly every interface has a sufficient response.
Sample Rate
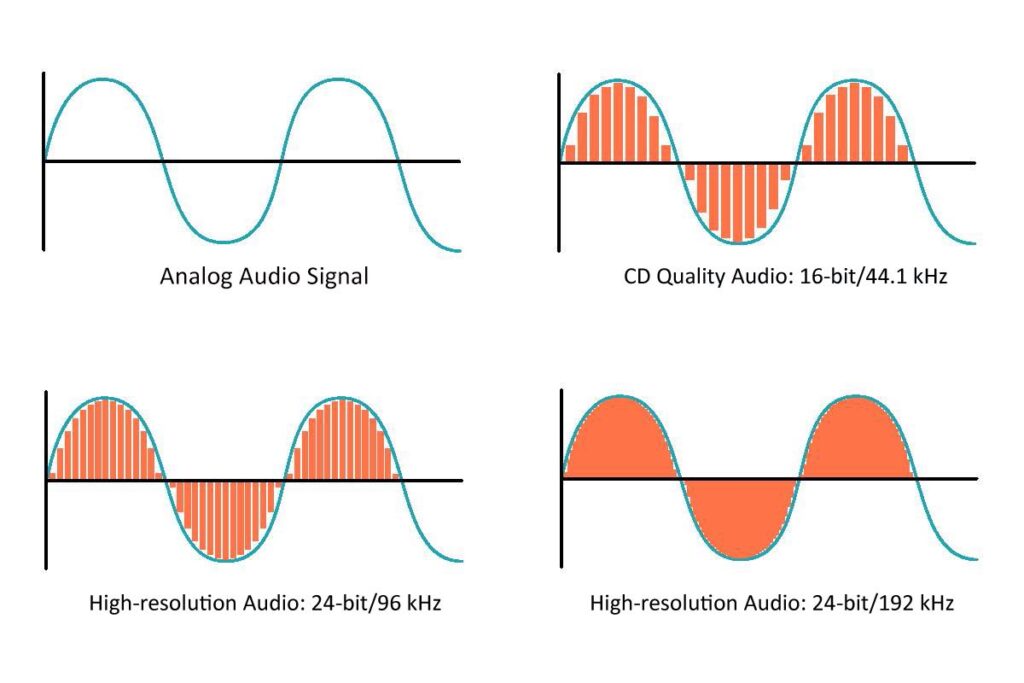
Sample rate measures how many times an interface’s analog-to-digital converter (ADC) measures an audio signal’s amplitude per second.
For example, at a sample rate of 44.1kHz, an ADC sample an audio signal 44,100 times per second.
To better understand sample rate, it’s important to note that an ADC converts audio signals into digital information that your computer can process.
To do so, it measures the amplitude of incoming audio signals at regular intervals. Then, it creates digital copies based on these measurements.
Increasing Sample Rate
In theory, increasing your sampling rate – the number of measurements taken per second – will produce a more accurate digital representation of your audio.
In other words, when your ADC captures more samples, it can paint a more detailed picture of your audio in digital form.
These days common sample rates are 44.1, 48, 96, and 192kHz.
Are 96 and 192kHz Sampling Rates Necessary?
People often ask if 96 and 192kHz sampling rates are necessary, and the simple answer is no.
They aren’t necessary because 96 and 192kHz record and playback frequencies beyond the 20Hz – 20kHz human hearing range.
You can multiply 20kHz by 2 to figure out the minimum sample rate you need to cover this range – which is 40kHz.
Therefore, an interface with a 44.1 and 48kHz max sample rate can record and reproduce every sound we hear.
Why are there so many interfaces with 96 and 192kHz max sample rates if that’s the case?
Recording and Mixing at Different Sampling Rates
Manufactures list the max sample rate, but you have the option to record at lower ones.
Most people tend to record at 44.1 and 48kHz. Recording at higher sample rates is taxing on your CPU and unnecessary.
However, 192kHz is the gold standard for sound design and film production.
You can record sounds at 192kHz and mix them at 96kHz to create unique effects without sacrificing audio quality.
To summarize, we recommend an audio interface with at least a 96kHz sample rate, but even 48kHz interfaces are great for basic recording.
Bit Depth
We can’t mention sample rate without bit depth.
These concepts often get confused.
The sample rate is how often your interface samples an audio signal per second.
On the other hand, bit depth is how much information your interface collects during each sample.
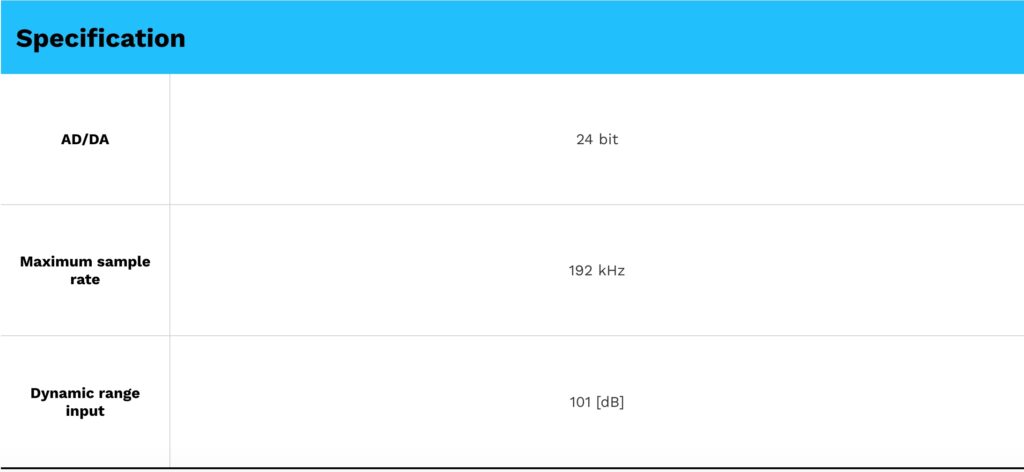
Typical bit depths are 16 and 24-bits.
24-bit interfaces offer a higher dynamic range based on the idea that 1 bit = 6dB.
In theory, 16-bit interfaces can achieve a dynamic range of 96dB while 24-bit units can reach 144dB.
Generally, we suggest a 24-bit interface since they tend to offer a higher dynamic range.
Dynamic Range
Speaking of dynamic range, it’s the difference between the loudest and quietest (above its noise floor) an interface can record and playback.
With a higher dynamic range, you’ll have additional headroom, which gives you more leeway when setting gain levels.
You can think of headroom as the buffer between the average recording level and the level where distortion is introduced.
With less dynamic range, you’ll have a tighter window to work in, so you’ll have to be very accurate when setting your gain to avoid clipping.
What’s a Good Dynamic Range
You’ll find that budget interfaces under $100 tend to have a dynamic range between 85 and 100dB. A few examples are the M-Audio M-Track Solo and Duo and the PreSonus AudioBox USB 96.
Conversely, more expensive entry-level interfaces and higher-end units tend to be closer to 120dB.
Some of the most affordable interfaces with a high dynamic range are the Motu M2 and the Audient iD4.
We recommend an interface with a dynamic range above 100dB, but one in the 90s is sufficient if you’re on a budget.
Input and Output Impedance
Input impedance measures an input’s resistance to an incoming audio signal.
Using a method called impedance bridging, we can determine that an input should be at least ten times the impedance of the audio source for the best results.
You’ll find that most microphones have an output impedance of around 200 ohms, while most interfaces tend to have an input impedance of about 3,000 ohms or 3 kohms.
You’ll also find separate impedance measurements for line and instrument inputs much higher than mic input impedance.
Impedance is also stated for an interface’s outputs which tend to be much lower than input impedance – normally under a few hundred ohms.
Mic Preamps Specs
Gain range
A gain range of -10dB to +44dB means an interface reduces gain by -10dB at its lowest setting and boosts it by 44dB at its highest.
You may also see gain as a single number representing the total amount of adjustable gain. In this example, it would be 54dB.
We like to see a total gain range of 50-65dB and low preamp noise.
Interfaces with these characteristics work great with gain-hungry dynamic mics like the Shure SM7B.
Equivalent Input Noise (EIN)
EIN measures preamp noise at an interface’s maximum gain level.
Preamp noise is the white noise you may or may not hear in the background of your audio.
Generally, we suggest paying attention to EIN if you use dynamic mics since they require more gain.
A preamp with an EIN of around -130dBu is ultra-low noise. Notably, the Solid-State Logic SSL 2 has an EIN of nearly -131dBu, and the Audient iD4 is just under -130dBu.
An interface with noisier preamps is the AudioBox USB 96 with an EIN of around -117dBu.
We recommend preamps with an EIN lower than -125dBu. Anything above -120dBu will add a noticeable amount of noise to your signal.
THD+N
THT+N is the total harmonic distortion and noise your interface adds to an audio signal.
It’s usually stated as the percentage of the total harmonic distortion plus noise you can expect relative to the original signal.
You’ll want this measurement to be as low as possible.
Inputs and Outputs (I/O) to Look for
Here are the devices you can connect to an audio interface with the following I/O:
Mic Inputs
- Condenser mic
- Dynamic mic
- Ribbon mic
Instrument Inputs (Hi-Z)
- Guitar
- Bass Guitar
- Other instruments
Line Inputs
- Mic preamps
- Compressors
- Mixers
- Other line-level sources
Main and Line Outputs
- Studio monitors
- Headphone amp
Headphone Output
- Studio headphones
- Headphone amp
MIDI I/O
- Connect vintage MIDI and digital keyboards
SPDIF and ADAT
- Connect to other interfaces to expand I/O