The RME Babyface Pro is a powerful and versatile interface that offers great value for its price.
The Universal Audio Apollo Twin X offers more features but comes with a higher price tag.
So, which one is the better option for you?
In this post, we’ll compare the RME Babyface Pro and the Universal Audio Apollo Twin X to help you decide which one fits your needs better.
RME Babyface Pro vs Universal Audio Apollo Twin X
The main difference between the RME Babyface Pro FS and the Universal Audio Apollo Twin X is that the Apollo Twin offers more DSP plug-ins and features Unison-enabled preamps.
However, both units offer top-notch sound quality and features. Whichever interface you choose, you’ll get a high-quality product that will serve you well for many years to come.
We recommend the Apollo Twin if you have some extra money to spend. But the Babyface Pro is an excellent alternative if you’re on a tighter budget.
RME Babyface Pro FS
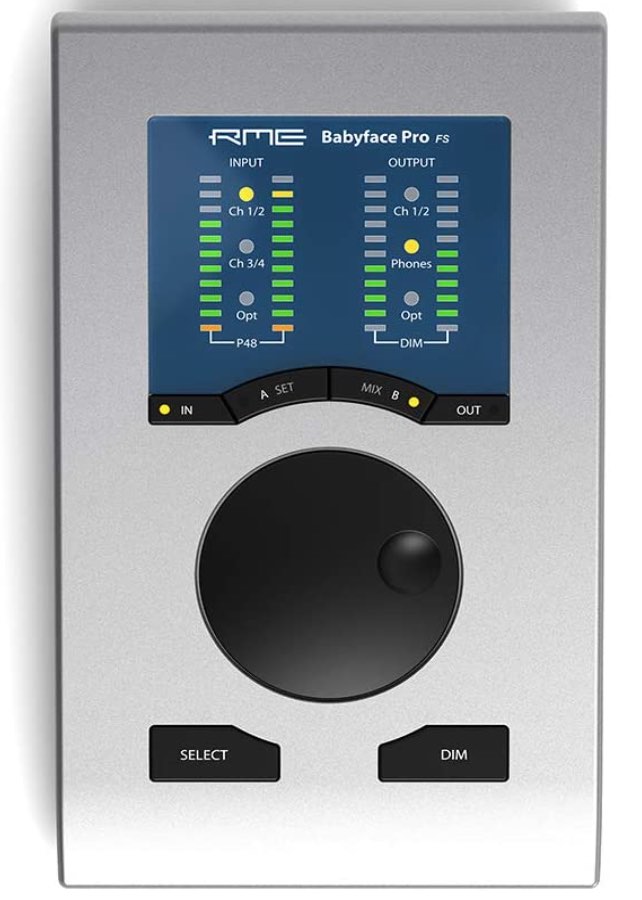
The RME Babyface Pro is a high-quality audio interface perfect for professional and home studio applications.
It offers excellent sound quality, low latency, and a wide range of input and output options.
The build quality is some of the best you’ll find, and the unit is very easy to use.
Overall, the RME Babyface Pro is an excellent choice for anyone looking to upgrade from an entry-level interface. It has advanced features – like DSP effects – that you won’t find in more affordable units.
Build and Design Quality
The Babyface Pro comes in a hefty aluminum casing giving it a premium, durable feel.
The first thing you’ll likely notice is how different this interface looks compared to other units.
It has a sleek minimalist design with a multifunctional volume knob in the center and surrounding buttons to control specific settings.
For instance, you can set the gain for your mix inputs with the “IN” button, control the volume of your headphone and main outputs with the “OUT” button, “dim” your outputs, and program-specific buttons using the “select” button.
There are also helpful LED level meters on the top panel for each input and the main outputs.
These LEDs make it super easy to set and monitor levels on the fly.
Features and Controls
You’ll get two XLR inputs and outputs on the back of the Babyface Pro. These XLR mic inputs can act as line inputs when you change their settings in the control panel.
On the left, you’ll find an optical input and output that you can use to expand your channels through ADAT or SPDIF connection.
There’s also USB-B, MIDI, and DC power connection.
On the other side, you’ll get a pair of unbalanced ¼-inch line/instrument inputs along with a ¼-inch and 3.5mm headphone output.
Audio Quality
The Babyface delivers pristine audio quality thanks to its flat frequency response and top-tier dynamic range of around 116dB – ensuring your audio is clear and accurate, and you have plenty of headroom while recording.
Mic Preamps
One knock against the Babyface is that its preamp slightly underperforms compared to more affordable units.
This interface has an EIN slightly above -129dBu, which means you’re unlikely to hear a noticeable amount of preamp noise even with gain-hungry mics.
However, if you’re specifically looking for an interface with low-preamp noise, there are some more affordable units with slightly better performance.
With that said, the Babyface offers a whopping 76dB gain range which you won’t find in cheaper units.
This range provides plenty of gain for low output dynamic mics like the Shure SM7B. It also provides a wide window to accommodate various output level sources.
TotalMix FX Software
The Babyface Pro FS also includes RME’s DSP TotalMix FX software – compatible with Windows and Mac – which is a real-time mixer that lets you add effects, adjust your levels, and control other features included with the Babyface like Audio Loopback.
You can also add a 3-band parametric EQ, reverb, compressor, and delay to your inputs and outputs within the software.
Since these effects are DSP-based – meaning they’re built into the interface – adding compression, reverb, etc., while recording won’t put stress on your computer’s CPU or dramatically increase latency.
Universal Audio Apollo Twin X
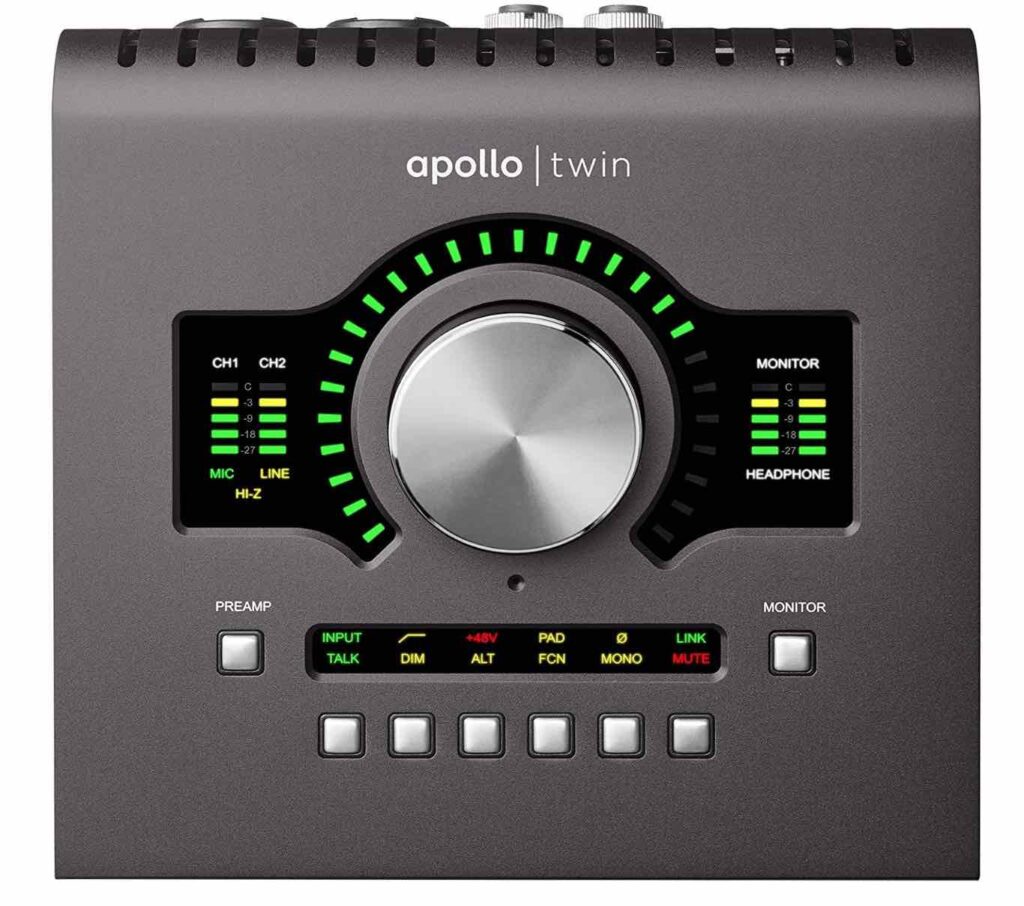
The Universal Audio Apollo Twin is a professional-quality interface that boasts various advanced features.
It has two world-class Unison-enabled microphone preamps, 24-bit/192kHz converters, and Universal Audio’s renowned DUO or QUAD Core DSP processor.
The Apollo Twin also comes with Universal Audio’s Realtime Rack plug-in suite, which gives you access to a wide range of software emulations of UA’s classic analog hardware.
UA Apollo Twin X vs RME Babyface Pro Comparison
The Apollo Twin has a much larger interface than the Babyface Pro. But surprisingly, they weigh about the same.
It’s hard to find an interface with a better build than these two units, but we give the slight edge to the Babyface in terms of durability.
The Babyface Pro is also very sleek making it ideal if you need an advanced interface for the road. You can slip it into the side of your bag without worrying about damaged knobs.
With that said, we prefer the design of the Apollo Twin because of all the features you can control with the click of a few buttons.
Preamp Controls

Here’s a quick breakdown of how to use all of the buttons on the Apollo Twin:
You can switch between each input using the “preamp” button.
After pressing the “preamp” button, each of the six buttons on the bottom lets you control different features for your selected input.
1st Button (Input)
Switch selected input between mic and line level
2nd Button
Add a high pass filter to your input to remove unwanted low frequencies
3rd Button (+48V)
Enable/disable phantom power
4th Button (Pad)
Add a 20dB pad
5th Button
Polarity inversion
6th Button (Link)
Link the two inputs to record in stereo
Monitor Controls
On the opposite side of the “preamp” button is a ‘’Monitor” button.
When you select the monitor button, you can switch between your monitors and headphones and use five of the six buttons on the bottom to control certain features.
1st Button (Talk)
The Apollo Twin has a tiny mic on its top panel.
You can use the talk button to communicate with a vocalist while monitoring her performance from another room.
2nd Button (Dim)
Dim your speakers or headphones
3rd Button (Alt)
The Alt button lets you switch between monitors if you have two pairs connected.
5th Button (Mono)
Listen to your audio in mono.
6th Button (Mute)
Mute your speakers
Design
The UA Apollo Twin features two Unison-enabled mic/line inputs on the back.
With Unison preamps, you can apply classic vintage and tube preamps emulations from Neve, API, Helios, UA, etc., to your mic inputs.
You’ll get a ¼-inch Hi-Z instrument input, two sets of ¼-inch main and line outputs, and a ¼-inch headphone jack.
The Twin also comes with a 12VDC power connector, Thunderbolt port, optical input to expand your channels for large recording sessions, and a power switch.
Features and Controls
The Apollo Twin features an LED level meter with a clipping indicator for each input and output.
It also has a volume meter around the main knob.
Additionally, you’ll get an LED panel with surrounding buttons to control specific settings.
Universal Audio DSP Effects
The Universal Audio Apollo Twin X DSP Effects are built-in plug-ins modeled after UA’s classic analog hardware.
These effects include reverbs, delays, EQs, and compressors.
You can record with these effects without adding latency or overworking your computer’s CPU.
Apollo Twin Duo vs. Apollo Twin Quad
The Apollo Twin Duo and Quad are the same interface, except the Duo has two processing cores and the Quad has four.
You can run more DSP plug-ins simultaneously with the Quad since it has more processing power.
It’s hard to determine exactly how many more plug-ins you can run since effects vary in how much CPU they use. But generally, the Apollo Twin X Quad is best for mixing-heavy engineers and professional home studios.
Our Recommendation: RME Babyface Pro or UA Apollo Twin X?
So, which audio interface is right for you?
We recommend the Universal Audio Apollo Twin X. It’s easier to use and has a few extra features – like the Talk button with is great for home recording studios.
You’ll also get a few more onboard controls like a Low-Cut Filter and a 20dB Pad button.
Either way, you can’t go wrong.


