So, you want to record studio-quality audio from home?
But you’re feeling overwhelmed by all the audio interface options out there?
You know you need one, but don’t want to make the wrong choice?
Every self-recording artist, music producer, and audio engineer has been in your shoes.
The good news is, with the right understanding of what to look for, you can select an interface that fits your needs and exceeds your expectations.
In this audio interface buyer’s guide, we’ll go through the key factors to consider making your decision.
Finding the right interface will get you closer to achieving the professional sound you desire from the comfort of your home studio.
We’re here to help!
What is an Audio Interface?
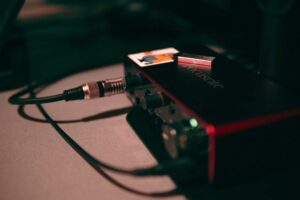
An audio interface helps you capture and playback high-quality audio.
You can think of an audio interface as a translator for your audio signals.
Just like a translator helps people who speak different languages understand each other, an audio interface takes the sound from your microphone or instrument and converts it into a language that your computer can understand and record.
It’s a middleman between your sound source and computer.
What does an audio interface do exactly?
It converts analog audio signals from microphones and instruments into digital information your computer can process.
It also receives data from your computer and converts it into audio signals for playback through studio monitors and headphones.
As you can see, an audio interface is the bridge between your mic, instruments, and playback devices and your computer.
It’s able to send and receive digital audio signals through various connection types – USB, Thunderbolt, Firewire, or a PCI card.
What to Look for When Buying an Audio Interface
Connection Types
Speed is everything when it comes to recording audio.
Specifically, how fast your interface can transfer data to and from your computer affects latency and stability.
There are four interface connection types: USB, FireWire, Thunderbolt, and PCIe.
Each operates at different speeds making some more useful than others in different recording scenarios.
USB
USB is the most universal interface connection.
I mean, what computer doesn’t have a USB connector? Which is why most entry-level interface use USB 2.0.
It’s the slowest connection on this list, transferring data at 480 megabytes per second (Mbps). But more interfaces are starting to use USB-C which can transfer up to 20 gigabytes per second (Gbps) when connected to a USB 3.2 port.
FireWire
While USB 2.0 offers convenience, FireWire 800 has a higher bandwidth, offering better performance and reliability when using more I/O.
You can also daisy chain FireWire interfaces.
Daisy chaining allows you to connect multiple FireWire interfaces together to expand your channel count.
The only downside is fewer computers and interfaces use FireWire than USB.
Thunderbolt
Thunderbolt 3 connection is becoming the standard for higher-end interfaces due to its high transfer speed and low latency.
It’s twice as fast as USB 3.2, transferring data at up to 40 Gbps.
Thunderbolt 3 and USB-C connectors are interchangeable, but you’ll need a computer that supports Thunderbolt 3 or 4 to take advantage of its faster speed.
PCIe
PCIe audio interfaces offer the fastest data transfer, making them useful for professional recording.
You can attach a PCI unit to your computer’s motherboard for instantaneous data conversion.
While they’re more expensive than USB interfaces, they offer very low latency and smooth performance with high track counts.
How Many I/O Do You Need?
Before buying an audio interface, consider what you need it for.
Are you recording yourself or one artist at a time?
Are you a producer/engineer who needs high-quality playback?
Are you looking to build a versatile home studio where you can record a small band?
Maybe you’re looking to record a drum set or a large ensemble.
Luckily, there are interfaces for a wide range of needs – from 2×2 I/O models to 20+ channel units.
It’s important to consider what you need an interface for.
Here are some tips to help you decide how many inputs and outputs you’ll need.
Solo Musician/Music Producer
A 2-4 I/O interface is all you’ll need as a solo musician or producer.
As a solo musician having an extra mic input may come in handy for collaborations.
Otherwise, having at least one mic, instrument, and line input each allows you to record your vocals, an instrument, and even connect a mic preamp.
I recommend producers use a four outputs interface.
Having four outputs makes it easier to connect a pair of reference studio monitors to complement your primary pair.
Reference monitors are helpful because give you another perspective on how your audio sounds.
Usually, you’d use a lower-quality pair of speakers as your reference monitors to get an idea of what the average person will hear when listening to your track.
But, you can also connect a pair of studio monitors with different characteristics from your main pair.
The more listening perspective you have when mixing, the better.
If a four-output interface is outside of your budget, you can use an output splitter.
A splitter will let you connect multiple output devices to two outputs.
Situation Where You’ll Need More Than Two Inputs
Using an audio interface with more than two inputs can open up various possibilities in your home studio.
You can record a band, a drum set, and even multiple guests on a podcast.
A multichannel interface gives you much more flexibility.
It ensures you won’t have to limit your recording session sizes and makes your studio more professional.
There are also interfaces with ADAT and SPDIF connections.
These connectors let you link two interfaces to expand your channel count for larger sessions.
Recording Quality
Tech Specs
The best way to get a sense of an interface’s recording quality is to read reviews or consult with other users.
However, looking at specs can help you compare models.
It gives you a general sense of where a unit falls in the interface hierarchy.
Important specs to consider are frequency response, dynamic range, bit depth, and sample rate.
Total gain/gain range and equivalent input noise can help you evaluate an interface’s mic preamps, especially if you’re using a dynamic microphone.
Check out this guide to learn how to evaluate these spec measurements.
What Features to Look for?
Basic Features
Two basic features come with every audio interface: direct monitoring and phantom power.
Direct Monitoring
Direct monitoring minimizes latency.
You would hear a noticeable delay between your voice and vocal recording without it.
Why?
It takes time for your audio to enter an input and exit an output.
Your audio has to go through your computer and back to your interface before you hear it.
That’s just the nature of recording.
Luckily, direct monitoring lets you hear audio directly from your interface.
Some entry-level interfaces have a direct monitoring on/off switch while others let you blend your direct input with your computer playback audio via a monitor mix knob.
I recommend the latter since it gives you more flexibility over your playback audio.
A monitor mix knob is useful when you want to minimize latency while recording through plugins.
Phantom Power
+48V phantom power provides condenser mics with the energy they need.
You’ll find this feature in nearly every interface.
Remember to turn it on for condenser mics and off for dynamic mics.
Intermediate Features
Level Meters
An audio interface with level meters can help you set your input gain.
Setting your gain accurately will prevent distortion and optimize your recording quality.
A level meter shows an audio signal’s amplitude.
You can see these levels in your DAW’s mixer but having a visual representation on your interface helps you efficiently set your gain and monitor for clipping.
Some models with helpful level meters are:
Analog Hardware Emulations
An audio interface with analog hardware emulations gives you flexibility over the tonal character of your audio.
These emulations are designed to recreate the sound of classic analog gear such as Focusrite’s ISA 110 and Universal Audio’s 610 tube mic preamp and 1176 compressor.
An interface with this feature can add warmth, saturation, brightness, and other characteristics internally.
Some interfaces with hardware emulations are:
- Focusrite Scarlett Interfaces – Air Mode
- Universal Audio Volt Interfaces – Vintage Mode and 76 Compressor Mode
- Solid State Logic SSL 2 – 4K Legacy Mode
Advanced Feature
Digital Signal Processing
An audio interface with digital signal processing (DSP) can apply equalization, compression, reverb, and other effects internally.
These interfaces are unique since most interfaces can process these effects without a DAW or external analog hardware.
The benefit of having built-in DSP is that it reduces latency and takes some pressure off of your computer’s CPU when you’re recording with plugins.
Some interfaces with DSP are:
- Universal Audio Apollo Solo and Twin
- Babyface Audio Pro FS
- PreSonus Revelator io24
- Motu UltraLite-mk5
Other Considerations
Easy-to-Navigate Interface
When researching an interface, consider its design.
Does it look easy to navigate?
Are its knobs and inputs logically placed?
Ideally, you want the ability to make quick adjustments.
There should be plenty of space between each knob.
Plus, its controls should be large and easy to identify.
Build Quality
You can’t afford to overlook an interface build quality if you plan on traveling with it.
An interface with a plastic exterior and loose knobs can easily get damaged, leading to potential malfunctions or even making it unusable.
It’s important to invest in a high-quality interface that is durable and reliable, especially if you’re frequently using it on the go.
Takeaway: What to Look for When Buying an Audio Interface?
Choosing the right interface can enhance your recording and production capabilities.
The challenge is finding one within your budget that suits your needs.
It’s tempting to grab the cheapest interface you can find. But it’s important to consider an interface’s recording quality, connectivity options, build quality, and features.
Investing in a high-quality audio interface will allow you to produce better audio, improve your workflow, and take your music to the next level.
So, take the time to do your research and read reviews.
An interface is one of the most important purchases you’ll make for your home studio.
Ultimately, your ideal interface should suit your recording workflow.
How many tracks do you need to record simultaneously?
Look into interfaces that can support the number of inputs you want to record at once.
Similarly, if you plan to use your interface for live performances or on the go, you’ll want to consider the portability and durability of different models.
Will you be recording through plug-ins?
If so, you may consider investing in a DSP interface.
There are many options out there but evaluating your needs will help narrow the list.


